Teaching Your Puppy to Tolerate Handling
Learn to let your dog be handled within the first 16 weeks.

By
Good Dog is on a mission to educate the public and make it simple for people to get dogs from good sources and for reputable breeders, shelters and rescues to put their dogs in good homes.
The restraint
Good Dog is on a mission to educate the public and make it simple for people to get dogs from good sources and for reputable breeders, shelters and rescues to put their dogs in good homes.
Good Dog is on a mission to educate the public and make it simple for people to get dogs from good sources and for reputable breeders, shelters and rescues to put their dogs in good homes.
- Introduction to Handling
- Lesson 1 - Tolerating Gentle Restraint
- Lesson 2 - Extending Restraint Time
- Lesson 3 - Handling Body and Legs
- Lesson 4 - Handling the Touchy Parts
Introduction to Handling
When we started Avidog we talked with a number of veterinarians to discuss our vision for helping people create happy, healthy, stable dogs. Without exception, every vet said it would be a home run for veterinarians, vet techs, groomers, owners, and most importantly, dogs if we taught people how to train their dogs to accept having all parts of their bodies handled.You would be surprised how little effort it will take on your part to teach your pup to accept being restrained and examined by both you and strangers. If you want to take on the challenge, here’s a plan for you to follow. Although it may seem like a lot of things to do with your puppy, you can do it in about two minutes a day. This type of training is best done as “commercial training”—while you are watching TV, start training when a commercial starts. When the show comes back on, you’re done! You don’t need to do everything mentioned above every day–mix it up making sure you practice everything, eventually focusing on the things your pup struggles with most!If you spend a couple of minutes each day from the day you bring your puppy home until he is 16 weeks old doing these things with him, you will have given him the wonderful gift of having conditioned him to accept and perhaps enjoy what is being done to him. Of course, it would also be great to continue doing this once a week for the rest of your dog’s life. Since he hopefully will only be going to the vet once or twice a year, practicing with him will help him to continue to accept being handled. It’s also a great way to be checking him for any new lumps and bumps that you might otherwise miss.Once you’ve made it through all the body parts, have other capable people also do these exercises with your puppy so he learns that the rules and rewards apply regardless of who is manipulating his body.
Rewarding Your Pup During Handling Exercises
As with all dog training, your goal is to teach your puppy that it can get what it wants by doing what you want. In the case of handling exercises, your pup will simply want you to stop handling parts of its body. That’s a fine reward to use as long as your pup is quietly tolerating the handling. In addition, generously reward your pup by marking calm acceptance and treating (for more on marker training, go here) and quiet praise when it is cooperating with you. As you progress you will decrease the number of rewards you give unless and until your pup must undergo a more painful treatment. Then you may have to repeat the early steps several times to regain your dog’s trust.
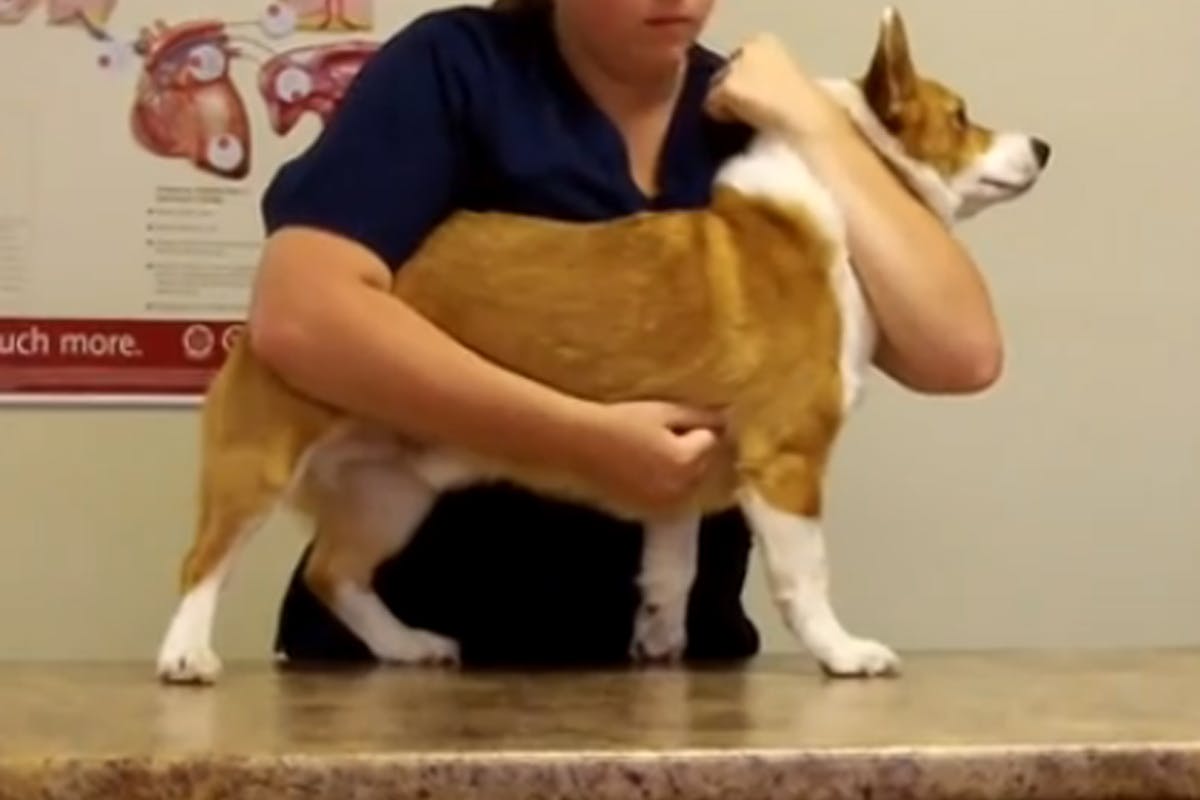
Lesson 1 - Tolerating Gentle Restraint
Start teaching your pup to tolerate gentle restraint the first week you get it home. To begin, find a comfortable place for you. If you can sit or kneel on the floor. Or sit on the couch or bed with your pup. Or put your pup on a grooming table. Then hold your puppy in your arms or otherwise gently but firmly restrain it.
- If it struggles hold it until it stops struggling! You can talk gently to the pup to reassure it.
- As soon as it stops struggling, let it go. Doing this teaches your pup that being still gets it what it wants—freedom.
- Be sure you never release your puppy when it is struggling. Instead, hang on gently but firmly until it stops!!! Then release immediately.
Repeat this 5-10 times in a session and repeat the sessions until your pup’s immediate reaction when you hold him is to hold still.
Lesson 2 - Extending Restraint Time
- Now that your pup has learned to stay still when restrained for an instant, let’s up the ante and increase the time you hold it in place.
- Start the session by repeating Lesson 1, with a “hold and release,” a few times.
- Next, hold your pup in place for 3 seconds. If it remains calm and quiet, release. If it struggles, hold gently but firmly until it stops then release.
- Continue on for 5-10 more holds varying the time you hold from 1 to 20 seconds. Again, only release the pup when it is calm.
Repeat these sessions until you can hold your pup for 20 seconds without it struggling at all. For some pups, this will take a day or two but for others, it may take many weeks.
Lesson 3 - Handling Body and Legs
Once your puppy is comfortable being held in place you are going to start handling and holding each part of your puppy’s body without struggling or moving away. If you need to, keep your pup on leash for this and simply sit on the leash so you have both hands free.
During these sessions, you are going to pair treats with handling, so you will mark and reward (yes/treat) when your pup tolerates your handling. If your pup struggles, you will do your best to not let go until it settles back down. However, don’t hurt your pup doing this. Better to let go and start again with smaller increments than cause pain during this training.
Start this lesson with what you think will be the easiest body part for your dog. Often that is the body and legs.
Body
- Run your hands over your pup’s back. If it does nothing, yes/treat. If it tries to move away, keep your hands on its back till it settles and then try again.
- Run your hands over its chest. If it tolerates this, yes/treat. I
- Run your hands over both sides of its abdomen. Again, yes/treat if puts up with this.
- While it is lying down run your hands over it belly, scratching it gently while you are there.
- Spread your pup’s legs apart and run your hands along it inner thighs.
Legs
- Pick up one of your pup’s leg just below its wrist on the front leg and knee/hock on the rear.
- Yes/treat if your pup tolerates this. If your pup pulls the leg away, gently hold the leg until it relaxes and then say yes/treat.
- Gently extend the leg forward and back. Yes/treat if your pup tolerates this.
- Gently move it from side to side but don’t force it in any direction. Yes/treat if your pup tolerates this.
- If your puppy struggles while you are manipulating a leg, gently hang on until it stops and then try again.
- Repeat with the other three legs, marking and rewarding if your pup tolerates your manipulations.
Repeat this session until you can touch your pup’s body and manipulate its legs without resistance.
Lesson 4 - Handling the Touchy Parts
Now it’s time to start handling what many dogs consider to be touchy places. Be confident that you can enable your dog to tolerate, if not even enjoy, this handling but it may require patience on your part.
Remember, you are going to pair treats with this handling, so you will mark and reward (yes/treat) when your pup tolerates your handling. If your pup struggles, you will do your best to not let go until it settles back down. However, don’t hurt your pup doing this. Better to let go and start again with smaller increments than cause pain during this training.
Start this lesson with what you think will be the next easiest body parts for your individual puppy from this list. It’s okay if all of them are challenging for your pup. If so, just work your way through them one at a time. Do one tough and one easier body part in each session, repeating each part until you go through the entire list and your dog will let you handle its entire body.
Feet
Nail and foot care are essential parts of our dog’s regular grooming. In addition, foot, pad, and nail injuries are common in dogs so being able to handle and examine our dog’s feet without a battle will make all of our live’s easier.
One of our challenges with handling paws is that many dogs are ticklish, especially between their toes. if this is the case with your dog, use firm touches so you aren’t tickling it.
The other thing that makes dogs very sensitive about their feet are poor nail trimming. If we are very nervous about nail care, then our dogs tend to be nervous. Equally bad is rough handling by others doing nail trims. And of course, cutting a nail too short although, if we don’t panic and simply use stypic powder immediately, the dogs tend of recover in seconds.
Do this training when your pup is sleepy and relaxed. During these sleepy sessions, you may not want to give any treats since they will wake your pup up. However, if your pup is awake and active, mark when your pup isn’t pulling back on its foot and give a lot of treats during this training.
Pick up one of your pup’s feet.
- Hold the foot gently in both hands for several seconds.
- If your pup is comfortable with that, move the foot back and forth, gently flipping it over so you can see both top and bottom.
- Examine the bottom of the foot, spreading the toes so you can peer between them.
- Examine each pad individually as if looking for a cut or slice.
- Examine each nail, moving the hair back if needed so you can see the entire nail.
- Move each nail gently, side to side, and up and down.
- Pretend like you are clipping the nail with your fingernails just to get your pup used to the feeling.
Ears
Examining and cleaning your pup’s ears weekly is an important part of its care. Especially if your pup has floppy ears, get it used to you touching its ears from the start.
- Lift the ear
- Rub the ear leather between your fingers
- Look closely at the inside of the ear, so your pup gets used to your head being near his head
- Sniff the inside of the ear. Yeast infections have a unique odor.
- Gently rub the inside of the ear.
- Repeat with the other ear
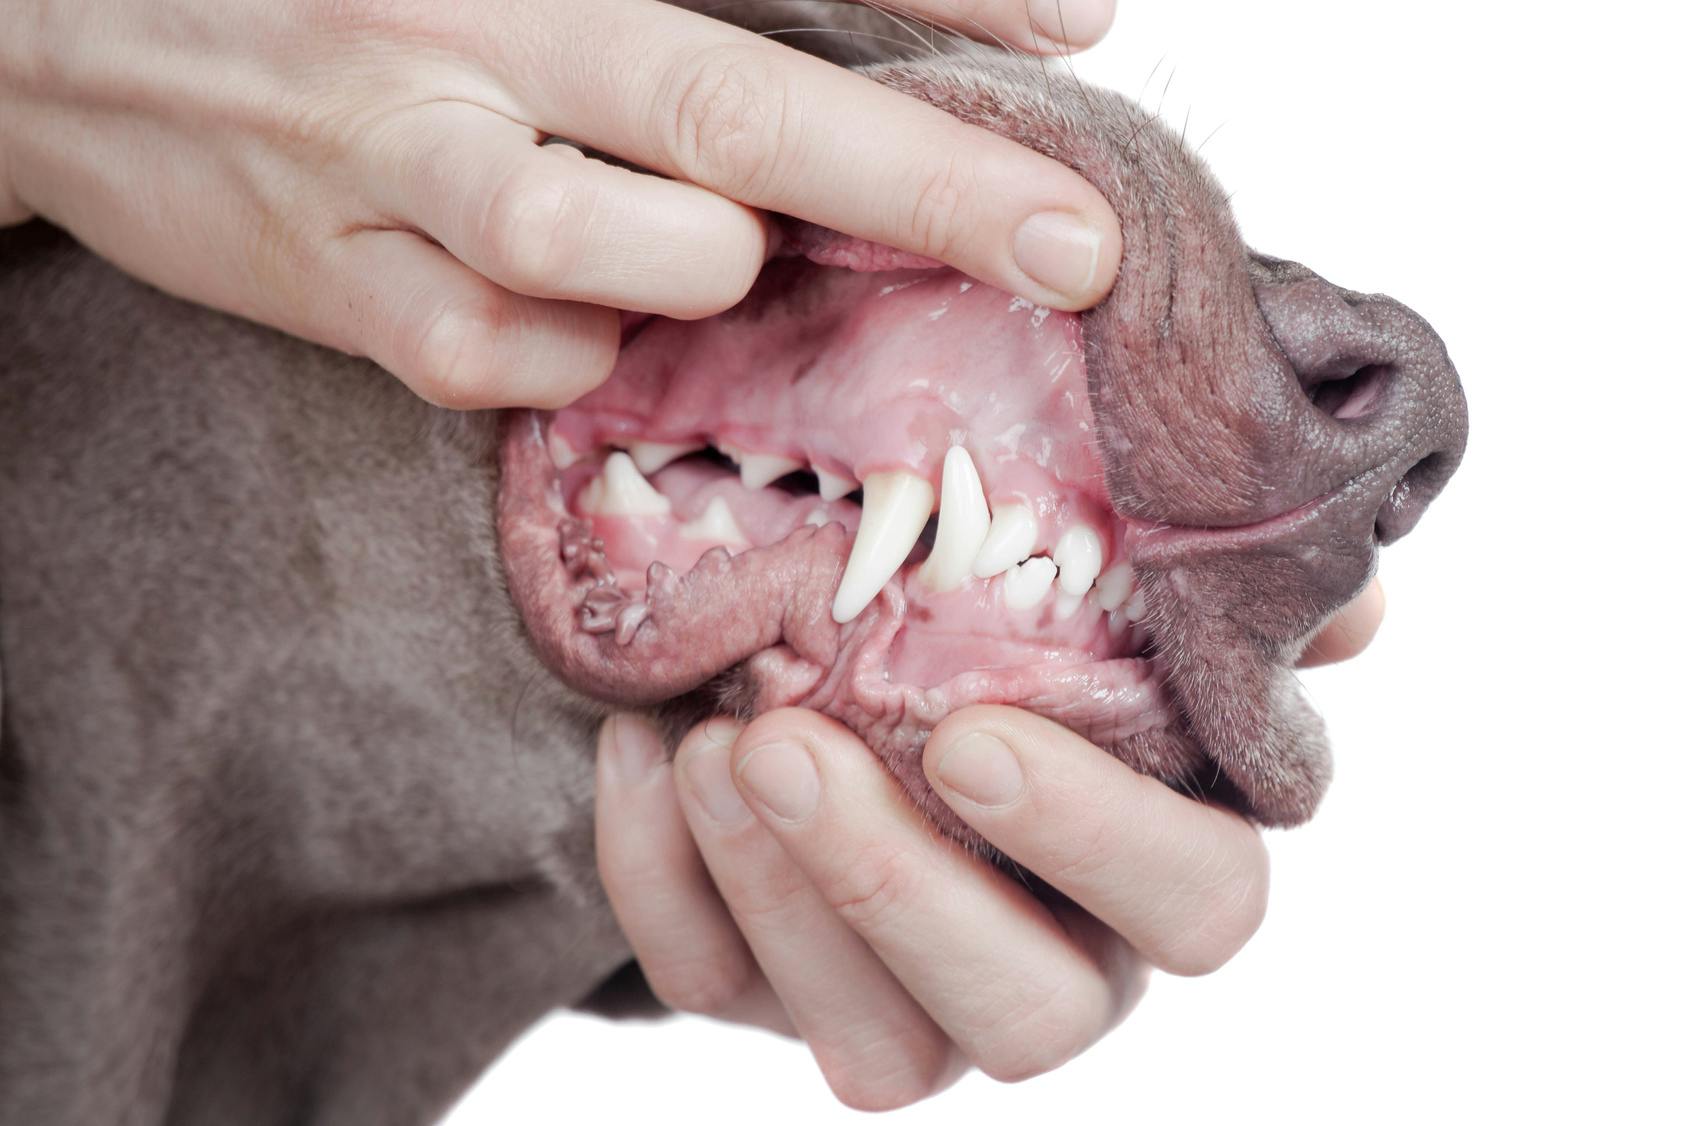
Mouth and Teeth
Especially during puppyhood and the senior years, examining and monitoring your pup’s teeth is important. Often, puppy teeth don’t fall out in time and are stuck as the adult tooth comes in. In later years, dogs often get slab fractures of their teeth. Looking for tartar and cleaning our dog’s teeth is as important for them as it is for us. In some breeds, we also need to be vigilant for lumps and bumps in our dog’s mouths.
This is one of the most difficult handling exercises for us and our dogs so take your time and reward small progress.
- Lift up the upper side of your dog’s lip and examine its teeth.
- Pull down the lower side of your dog’s lip and examine its bottom teeth.
- Repeat on the other side.
- Lift up the upper side of your dog’s lip and pull the back of its lip out so you can see the back teeth, top and bottom.
- Repeat on the other side.
- Rub your finger over his teeth and gums.
- Open your pup’s mouth slightly and close it.
- Open your pup’s mouth a little more this time. The wider you open its mouth, the more it will struggle so go a little at a time.
- Open your pup’s mouth more and look down its throat. Don’t hold its mouth open long the first few times.
Eyes
Most dogs find it very intimidating when a person stares directly into their eyes. Their discomfort grows, the closer we are to their heads. Yet, there are times we must look closely at our dog’s eyes to see if it has a foreign body or infection, or something is changing in the eye itself, like the development of a cataract. So practice this and talk gently to your dog to reassure it as you do this.
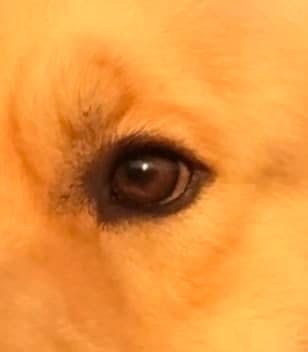
- Holding your pup’s head, look sweetly into its eyes.
- Touch the edge of an eyelid
- Gently spread the eyelids apart exposing the eye itself.
- Be sure not to touch the eyeball.
Genitals
Our pups’ genitals are an important part of their body that we need to be familiar with and examine regularly. With girls, we can see their vulvas and the skin around it. Noticing and responding discharge, swelling, or unusual forms can keep your pup healthy. For the boys, we need to examine and be familiar with their testicles, bulbous glandis (the bulb between the penis and testicles), and penises. Changes in any of these may be normal (young dogs get erections like other boys) but others may indicate a problem.
- Get your pup to roll over so you can see its genitals. Have a treat ready to go so your pup doesn’t leap up when you give it.
- Part the hair and examine the genitals.
- Gently touch your pup’s genital area. Use gloves if you want but move the vulva, testicles and penis.
- Carefully, trim the long hair around the area, which will reduce the chance your pup will get a UTI.
Tails
Depending upon the length of your pup’s tail and coat, you may need to bathe and brush it out regularly. We all also need to move our dog’s tails to check our pup’s anus and wipe off soft stool. Some dogs don’t care at all about their tails, others are quite sensitive.
- Gently lift your pup’s tail and move it up and down.
- Be sure not to force it in any direction.
- While lifting his tail, touch the area around his rectum.


